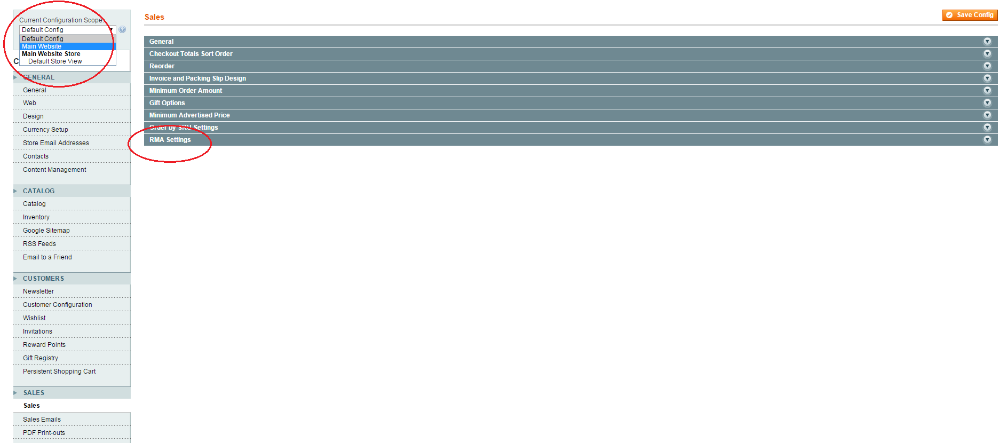
One of the cool features of Magento Enterprise is the ability to seamlessly manage returns in the Magento admin and allow customers to return orders. This Magento Enterprise functionality is called Return Merchandise Authorization. If you haven’t configured Return Merchandise Authorization on your Magento store, here is how to do it. To start with, you will want to go to System -> Configuration. From here, you will want to select your Store from the upper left drop down. Then click to Sales Tab -> RMA Settings.
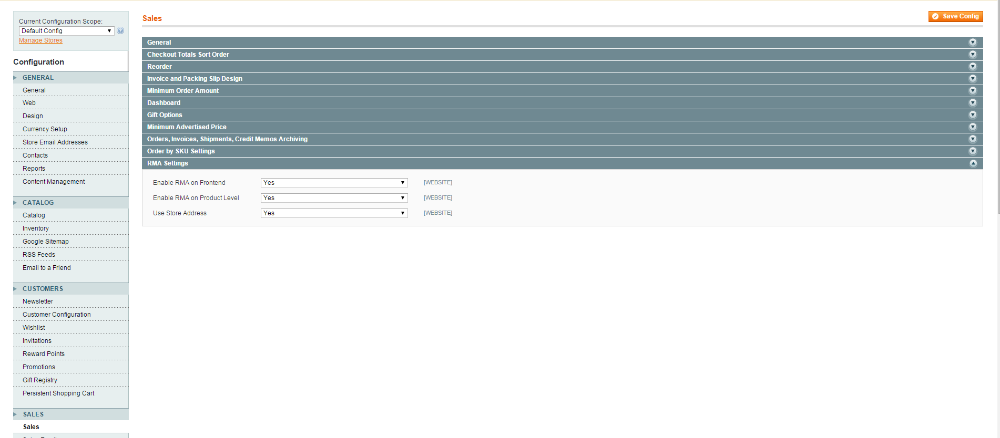
Set “Enable RMA on Frontend” to Yes. Then set “Enable RMA on Product Level” to Yes. Then, if you would like returns to go to the store address, leave “Use Store Address” set to Yes, otherwise set it to No, and fill in the required fields.
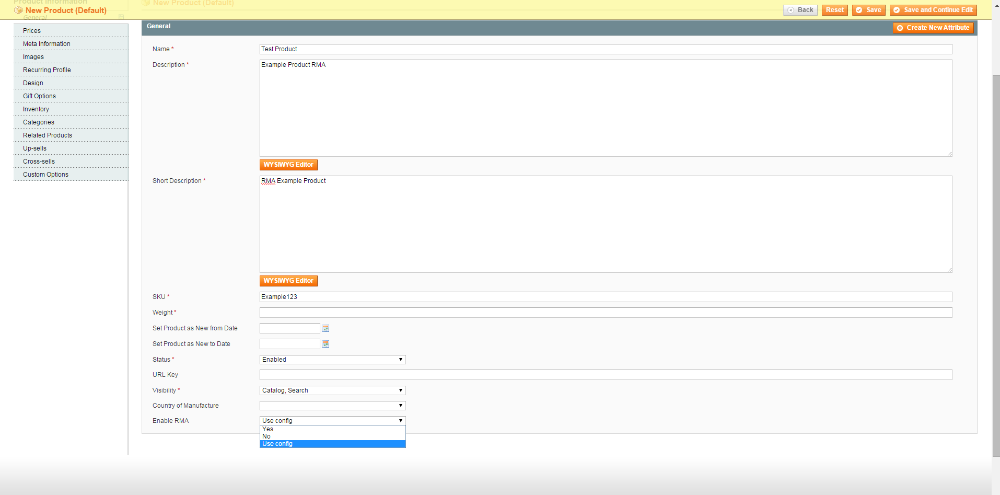
If RMA is enabled on the product level, navigate to your products and you will now have a setting under the “General” tab that is “Enable RMA. The default is to use config, but you can disable it by selecting “No” for certain products if you wish.
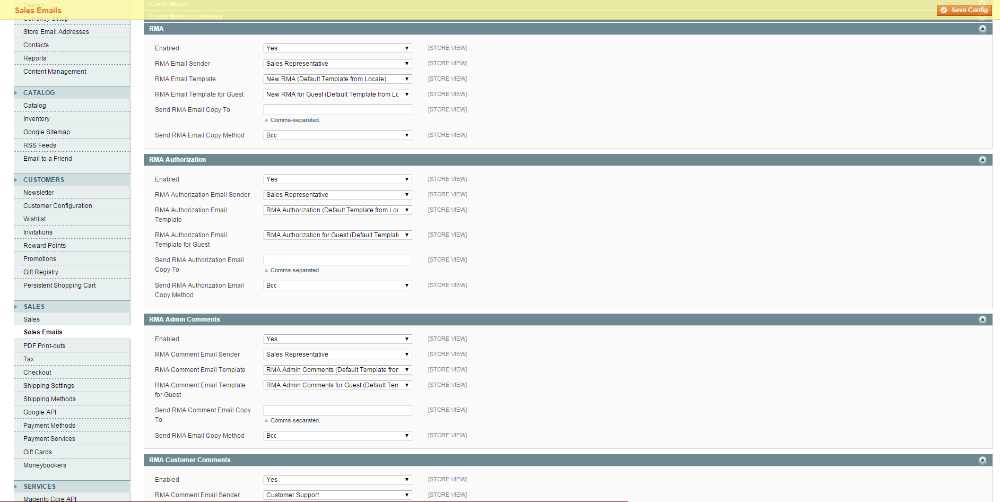
RMA Emails
This will allow Magento to send customers emails at different stages of RMA Processing. System -> Configuration -> Sales Emails. Click the RMA field. You will find several Tabs “RMA”, “RMA Authorization”, “RMA Admin Comments”, “RMA Customer Comments”. For each one, there is the ability to enable it, choose the RMA Authorized Email Sender (email@domain address). The template to use, the template for guest (doesn’t apply to customer commnets), a field to add addresses to copy the email to (CC) and the way that the copy (CC) email is sent.
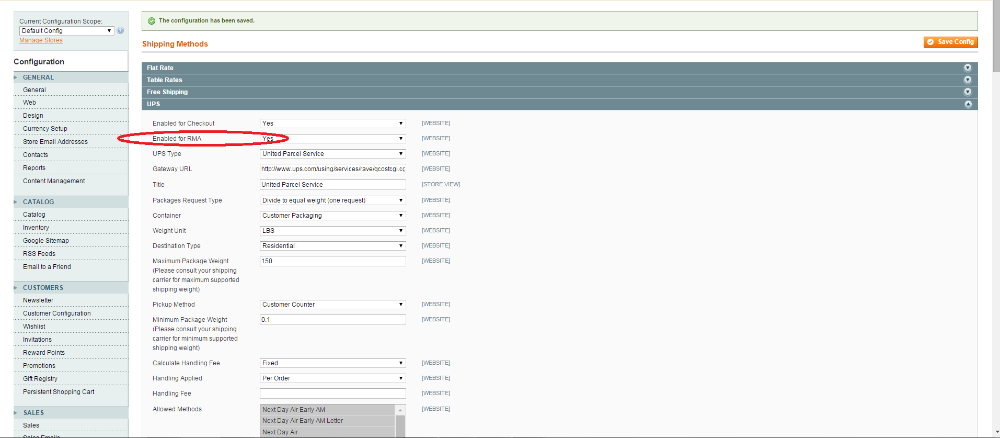
Shipping Methods For Returns
System -> Configuration -> Shipping Methods. Select the return service you wish to use, for this, we’ll use UPS. Set Enabled for RMA to “Yes”.
RMA Attributes
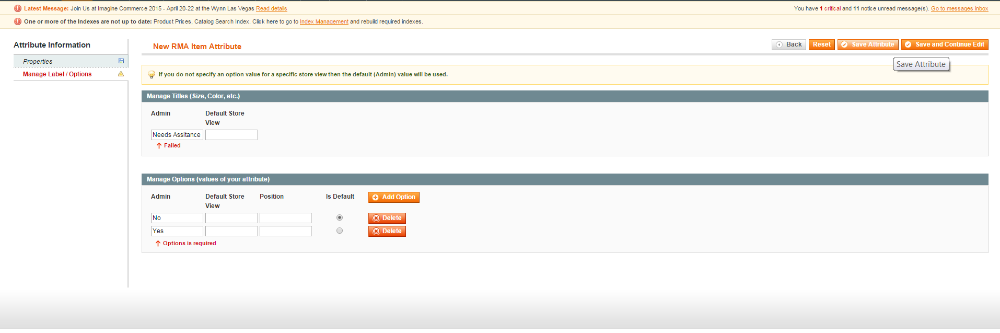
Next, navigate to Sales -> RMA -> Manage RMA Item Attribute. For this we will create an attribute field that will let the customer indicate if they would like a phone call to assist with their return process. To do this, we click “Add New Attribute”. We will make sure to set “Show on Frontend” to Yes so that the customer may select it. Then, we choose to use it in the default EAV Form. Click “Save and Continue Edit”.
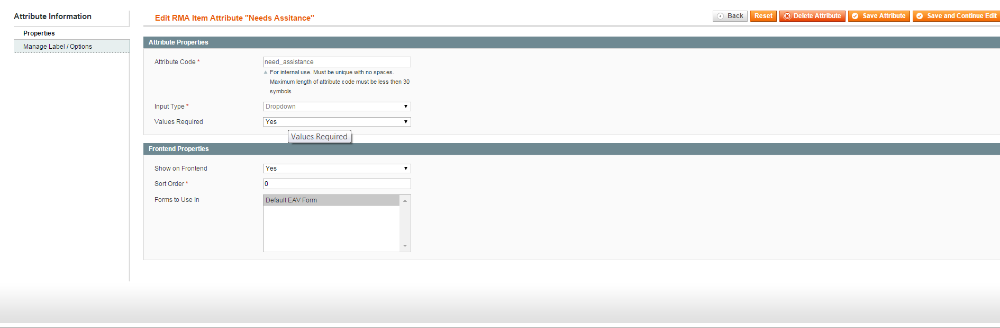
Next click on “Manage Label/Options”. Under Manage Titles fill in how the attribute will display in the admin. For this we use “Needs Assitance”. Next, Click “Add Option”. We will have No as the default. Save.
Customers
The customer can begin a return by going to “My Account” then clicking on “My Orders”. Next, they click on “View Order” for the order that they wish to view, and submit a return for. They will see a screen like this:
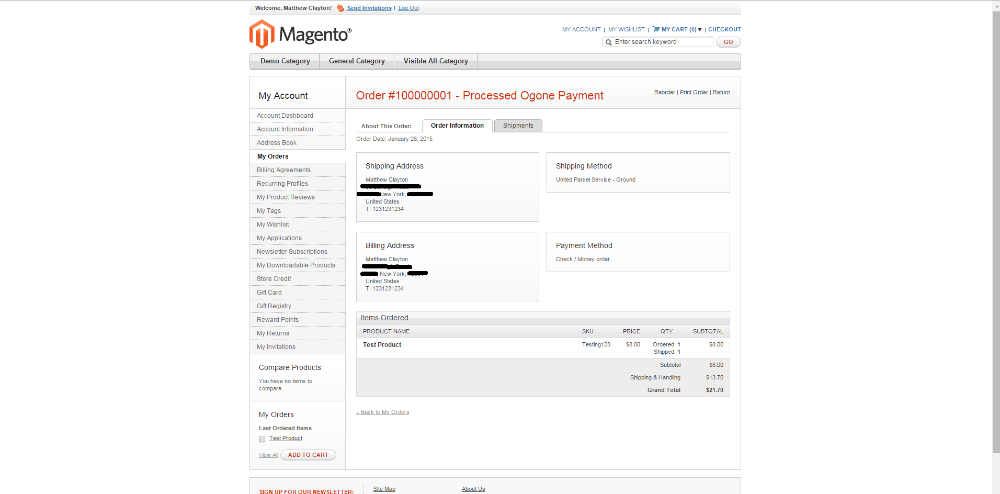
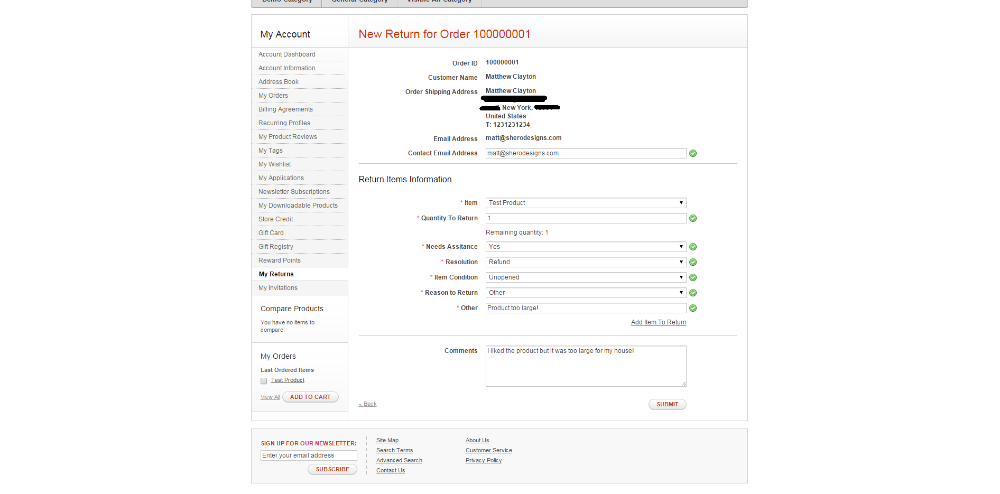
Then, they click on “Return” in the upper right hand corner and are shown form we created earlier. Notice, it also has the attribute we created from before:
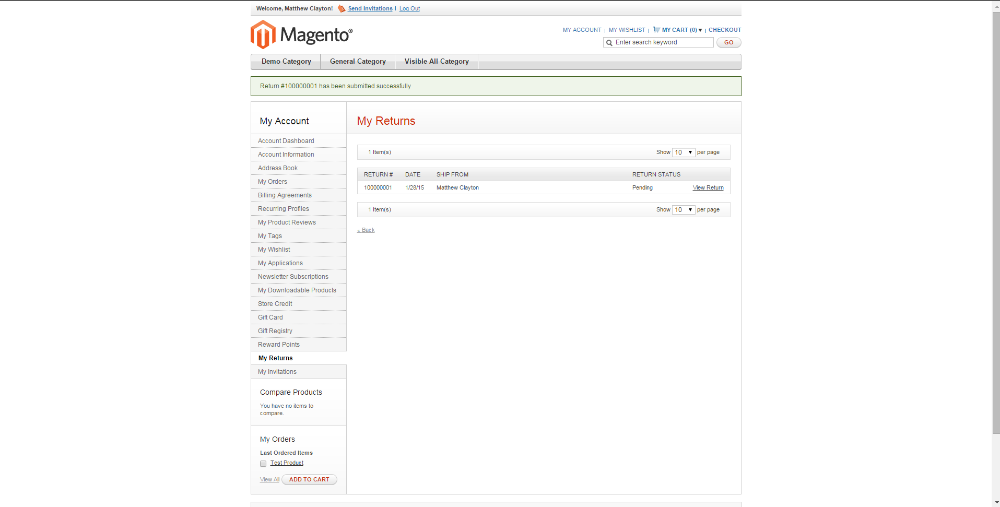
After they submit the form they will be able to view their return requests under “My Returns” tab:
In the admin, you will be able to approve return requests by navigating to Sales -> RMA -> Manage RMA
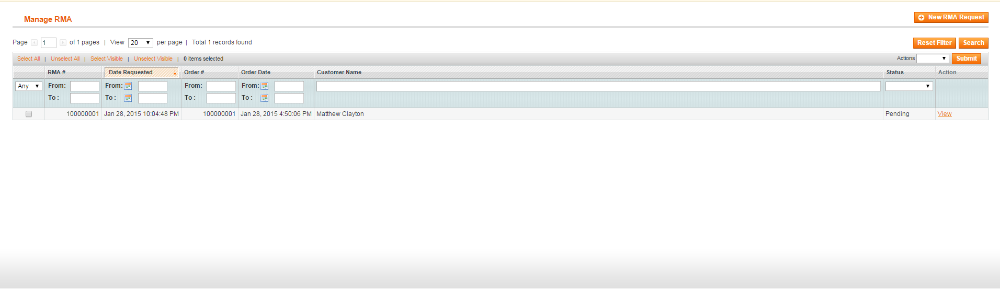
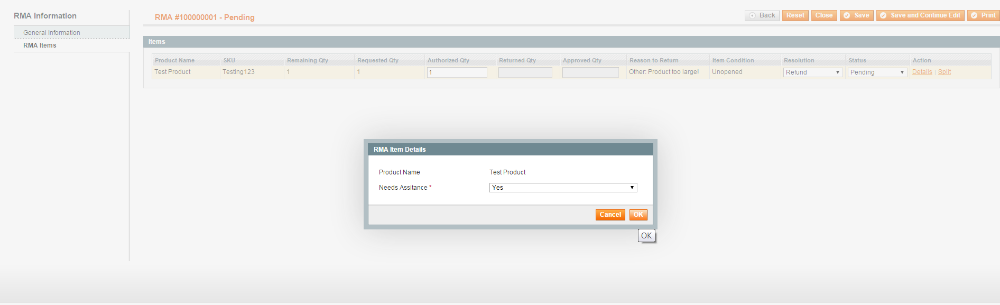
To approve or deny or change the “way” a return is processed, click on “View”. Then click to the RMA tab. Select how you would like return to be “resolved” under “Resolution”. Change the status under “Status”. For this order we will give the return “Store Credit” and “Authorized”. You will also have to set the Authorized Quantity to the amount desired. For this, it’s 1. Additionally, since we used a custom attribute, we will need to click on “Details” to see that the customer “Needs Assistance” and click on okay to approve.
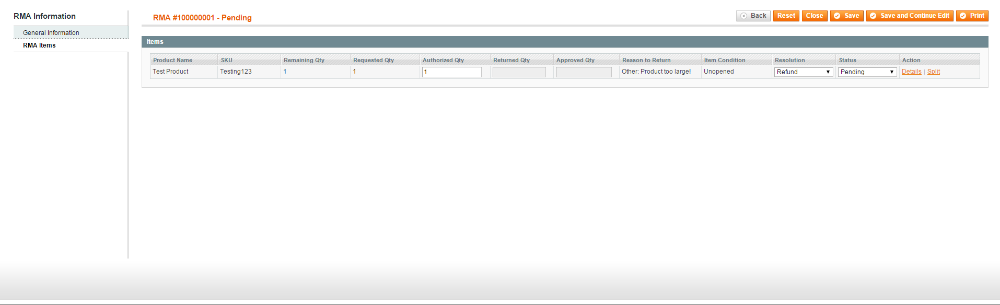
You will also notice a “Split” link on this grid. With that, if a customer has requested to return multiple items, you can split the request and approve certain items, but not others.
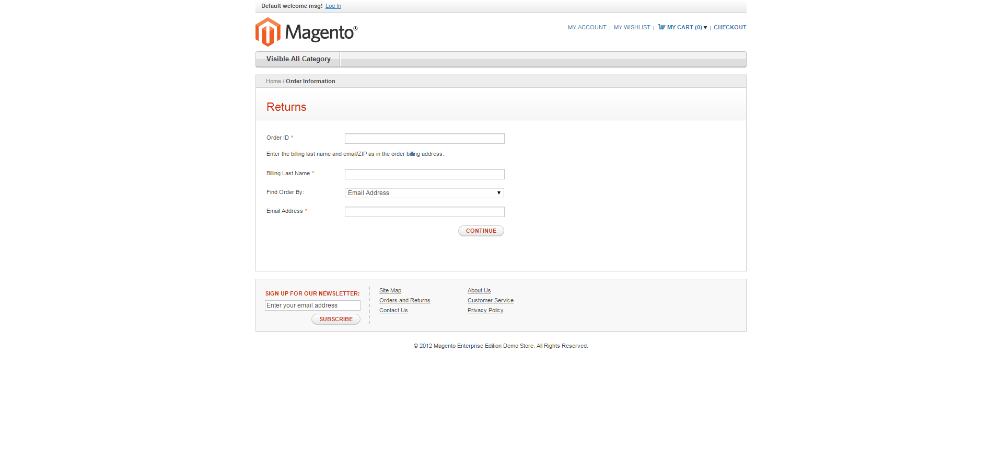
Note: Guests can also return orders by click on “Orders and Returns” in the footer of the site:

They will then see this screen:
There are also three ways to place and return request in the admin area. I will list them briefly: RMA Managing Section, Order Management section from the Order View Page, and Customer Management Section from the Customer View.
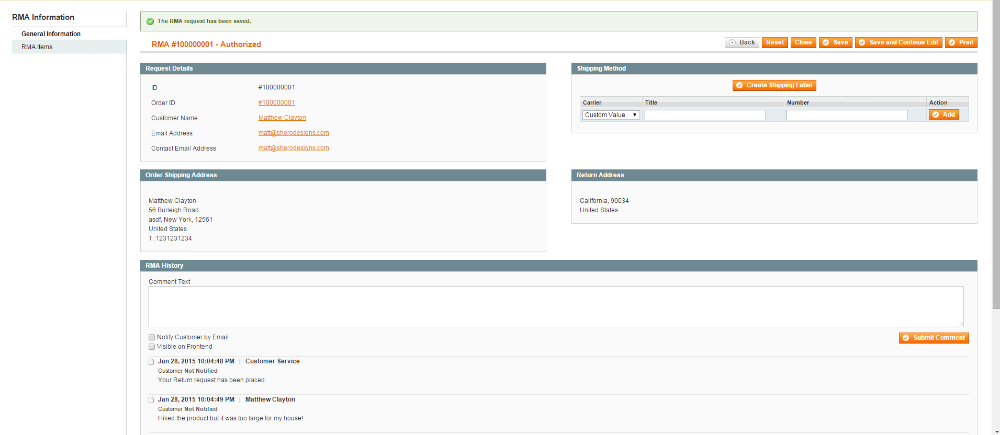
Generating Return Shipping Labels
After the return has been set to Authorized, go to the General Information tab. In the upper right, a new link should appear “Create Shipping Label”
A new Pop-up will appear:
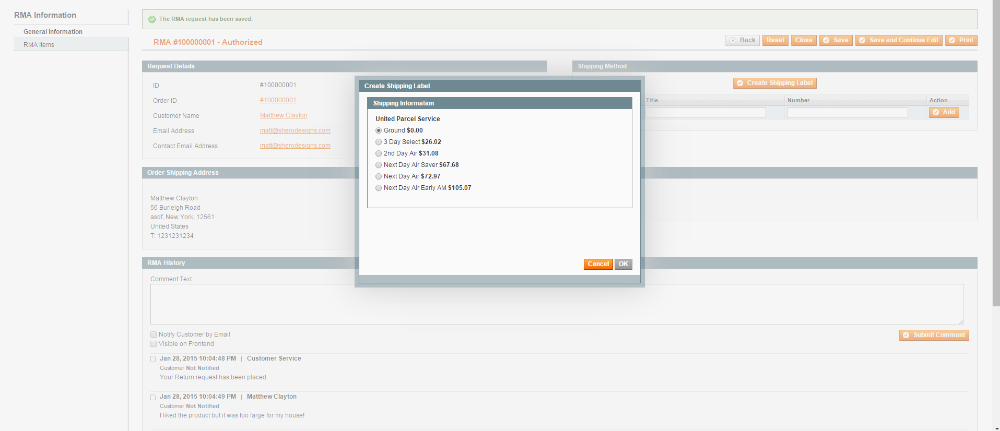
Select the shipping method you’d like and click “Ok”:
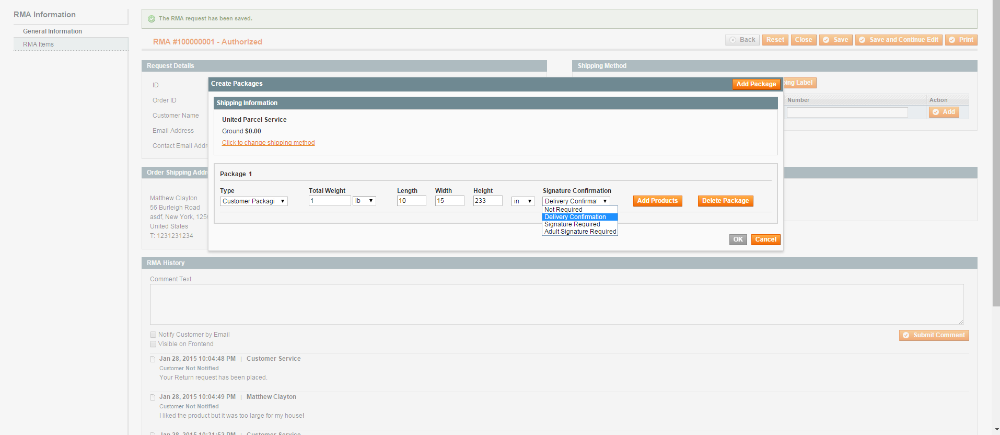
From here, click “Add Product” button and enable the product by clicking the tick boxes for each product you want to generate the label for:
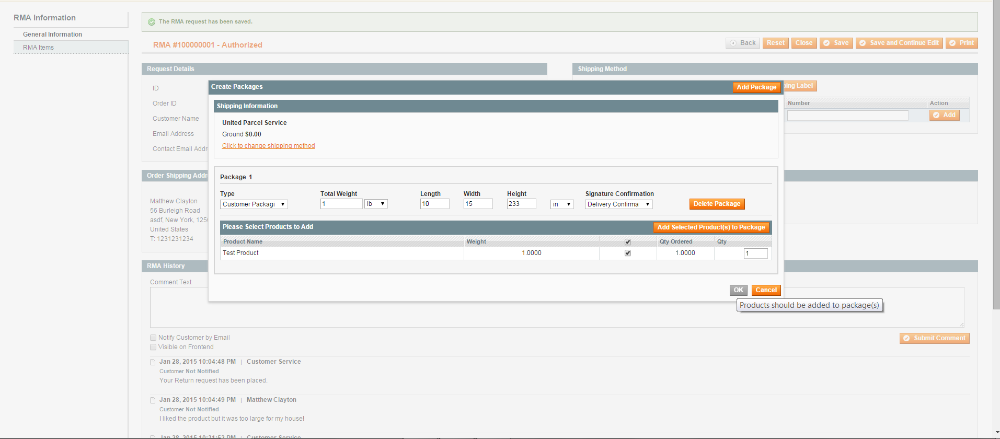
Click “Ok” and Magento will connect to the Carriers Website and Generate the Label which you can then print. To do this, click “Print Shipping Label”.
Let us know if you have a question by commenting below.
Magento Development Lead