Importing products with Magento’s standard import is a hassle. It is suggested that you first create a product with ALL possible attributes first and export it so you have a starting point. This method is slow and error prone. uRapidFlow solves these problems.
uRapidflow is a great extension for wholesalers and retailers to import and export products with multiple attributes. If you need to import products in bulk or update mass products using just SKUs; uRapidflow helps to reduce manual updating for categories, attributes and products.
If you are using a point of sale such as Counterpoint, uRapidFlow will be needed to sync products between Counterpoint and Magento. You can easily make changes to your products in Counterpoint and then those products will be synced back into Magento using uRapidFlow’s import feature.
Below is a tutorial on how to use the import and export feature of uRapidFlow.
To set up and use RapidFlow, navigate to System > RapidFlow in the admin side of Magento.
You’ll be taken to the RapidFlow profile manager, which should look something like this
In order to use the Import/Export, we need to create profiles. Let’s make an import profile.
Product Import
Click Add Profile.
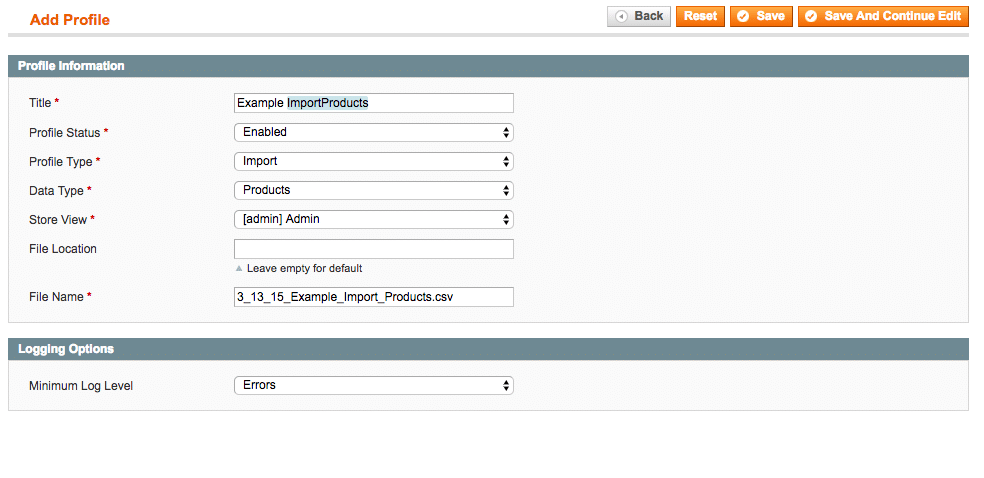
Enter the title for this profile. For organizational purposes, I suggest ending it with “Import Products” or something similar so you can easily tell them apart.
Make sure the Profile Status is set to “Enabled”.
Since we are importing products with this profile, we’ll select Import for Profile Type and Products for Data Type.
Select your Store View. The File Location indicates where RapidFlow will look for your file, in relation to Magento’s root folder. You can leave it blank if you decide to upload your file from the extension itself, which we will go over later. You can create a folder with FTP, if you want a specific place to put them and put the path here. For example, I like to put “var/import” here after having created that folder and upload my files to that folder.
Finally, File Name is the specific file RapidFlow will look for in the folder you defined. Be sure to add the file extension!
Since we’ll be importing a CSV file, the name here will end with “.csv”.
To differentiate between files, I suggest adding descriptive titles like the date and then import. Since this is an example, I’m going to name my file “3_13_15_Example_Import_Products.csv”. If you are going to got this route, you will have to update the file name every time the profile is run. If you would like to avoid this, you can use the same file name with less detail, like “import_products.csv”. You will just have to rewrite the file when you go to import.
Here is what mine looks like after all that:
After saving, you’ll notice more tabs appear on the left.
Clicking on the Format Options tab will bring you to the following
This tab gives information on how to save your CSV. You don’t really have to change anything here, unless your data has a lot of those characters in it, as it could potentially mess up the fields.
The next tab we’ll visit, the Import Columns tab is the most important, as it will essentially give you the tools to create the file you need.
The basic columns you will need are:
SKU
Name
Price
Attribute Set
Description
Short Description
Category Path(s)
Qty in Stock
Product Type
Status
Tax Class
Weight
These are columns that RapidFlow looks for and Magento needs for a product to display correctly. Without them, RapidFlow will deem your file invalid and will not import the products.
All that being said, let’s add them by scrolling through the list and adding them by double clicking.
Alternatively, you can try holding CTRL (on Windows) or Command (on Mac) and clicking on each attribute once to select multiple columns and then clicking Add New Columns to populate them above.
You can click on the orange arrows on the left and drag to re-arrange the order. Under Title Alias you can rename the column that RapidFlow will look for in your file. As long as the columns don’t have duplicate names (two “weight” columns), there shouldn’t be a problem. Try to avoid punctuation other than an underscore “_” or a period “.”.
After your columns are set, click Save and Continue Edit.
Now, we need to create a CSV for importing.
For any sort of Magento-related import or export, I highly recommend using OpenOffice Calc as opposed to MS Excel. Excel does not give the kind of control you need to edit CSV’s and is often interpreted wrong by Magento.
That being said, open up your chosen CSV editor and enter the columns we used above as they’re shown in the Title Alias field in the Import Columns tab in RapidFlow.
In the above example, I’ve filled out data that you can use as a basis for your data.
In OpenOffice Calc, when you go to save the CSV, select File > Save As… and make sure you check off “Edit filter settings”.
After naming the file with the same name we used earlier, under the Profile Information tab in RapidFlow, and confirming, you should see this pop-up.
Make sure it matches the Format Options tab in RapidFlow.
Click okay, and upload the file either through FTP or using the Upload Files tab in RapidFlow.
Click Browse Files… and find the file you just saved.
Double click it, and then click Upload Files.
Once you see it populated, click Save & Run.
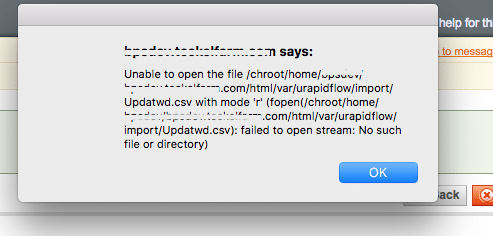
The Profile Status tab will appear and your products should come through. If it fails, RapidFlow will usually give you the error as to why, and you can also check this under the Profile Status tab.
I got a warning, and this is because I didn’t specify the parent category id. In this example, we see that RapidFlow instead chose to upload my product to the next category id.
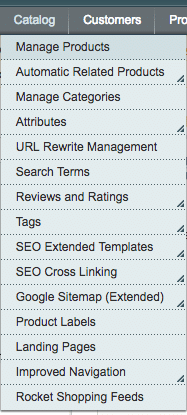
Let’s check for our product in Catalog > Manage Products.
At this point, I would suggest making sure that all your data matches up and to make sure the product’s Status is set to Enabled and that it’s Stock Availability is set to In Stock in order for it to appear on the front end, if you haven’t already added those fields when you were importing.
Product Export
The export process is largely the same as the import process.
The key difference is to be sure that you set the Profile Type under the Profile Information to Export rather than Import.
I also recommend that you set the export folder to “var/export” as you will have to get the file using FTP.
After specifying all your parameters, and you Save and Run your profile, navigate to your file using the path you specified in FTP. From there, you can download and view the file.
Support Operations Manager


