Creating a staging environment in Magento Enterprise simply means creating an environment that is not visible to customers, and where one can test out different features and make modifications without worrying about their store breaking or the visitors seeing any errors on the frontend. If you have a Magento Enterprise website this tutorial will go over how to configure and set up a staging environment for A-B testing.
Content Staging
The websites, live and staging, must share the same Magento installation. According to the Magento user guide, they can be on separate domains, “but they run on the same Magento installation and database as your live website”. They are accessed through a password-protected URL. All changes that occur during a merge can be set by an administrator – for example, moving over new attributes but not new categories.
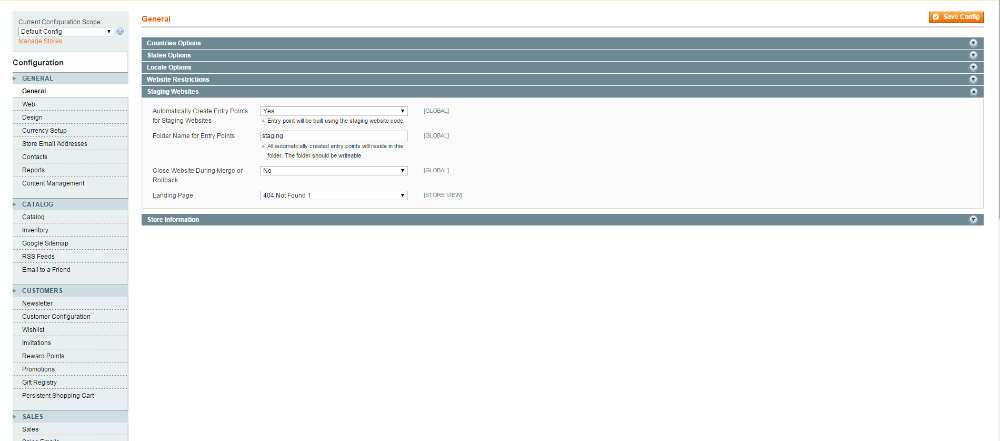
If you plan on having the staging website hosted on a separate domain, set Automatically Create Entry Points for Staging Websites to “No.” Enter a folder name under “Folder Name for Entry Points” – this is where, if Entry Points are automatically created, they will be stored. For “Close Website During Merge or Rollback” – you have three options “No,” “Take down entire frontend” (takes down frontend view), and “Take down only relevant websites” (restricts access to only those websites involved in the merge or rollback). The recommended option to choose here is “Take down entire frontend.” For “Landing Page” – select what you would like the customers to see during this merge or rollback.
Navigate to System -> Configuration -> General and then select the Staging Websites tab
Creating a Content Staging Website
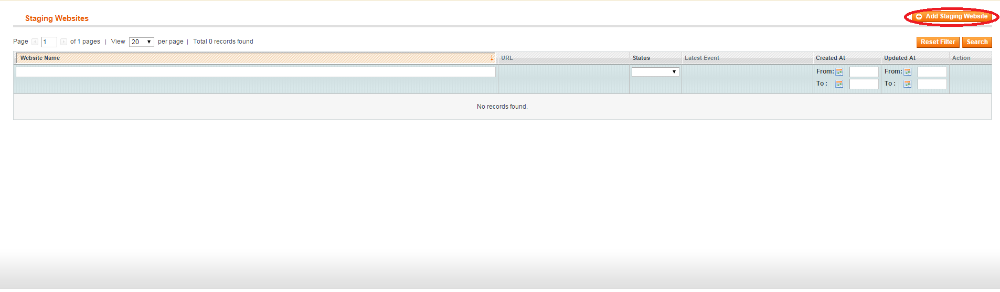
Navigate to System -> Content Staging -> Staging Websites. Click the “+Add Staging Website” button.
Options:
“Staging Website Code” – needs to be a unique identifier
“Staging Website Name” – needs to be unique name for the staging website
“Base URL and Secure Base URL” – base address for the Staging Website – if the website is on a separate domain or non-default location enter a value
“Frontend Restriction” – controls how the frontend of the staging website is accessed. “Not Accessible” – disable access to entire staging frontend. “Accessible” – staging site is open and can be accessed by anyone that knows the url. “Require HTTP Auth” – staging website prompts for username and password on access which can be configured below.
For “Select Original Website Content to be Copied to Staging Website” you have the option of selecting which content you would like copied over to the staging website.
“Select Original Website Store Views to be Copied to Staging Website” simply lets you copy over which ever store views you would like.
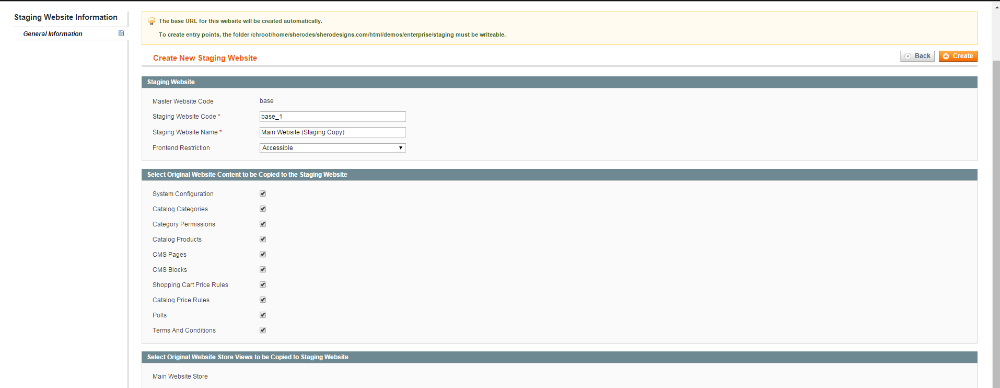
Click Create:
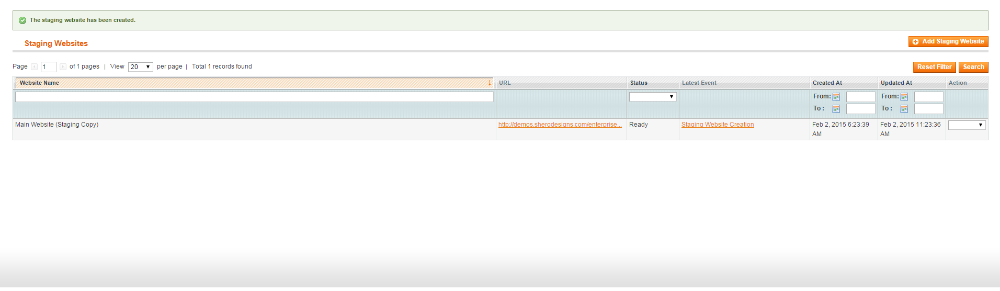
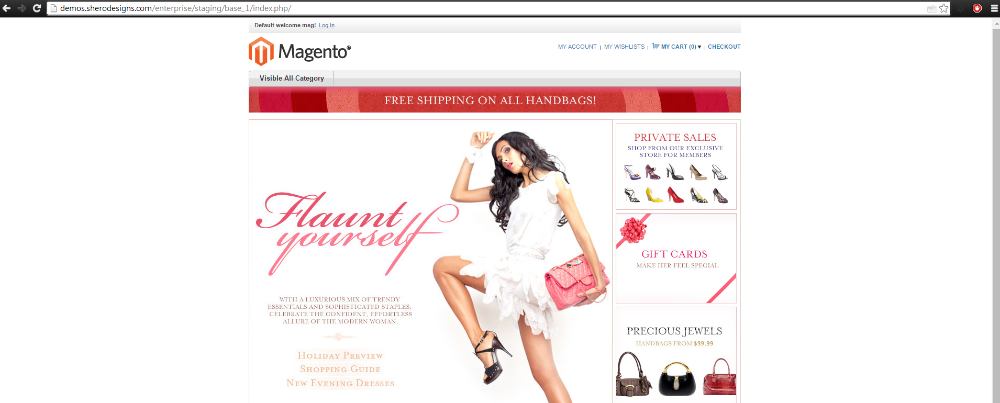
After clicking create, you can now see that our site is working. Click the URL listed on the grid:
Notice, in this screenshot, the URL includes the “Staging Website Code” that we defined earlier (base_1)
Merging Content
Navigate to System -> Content Sharing -> Staging Websites
Click on the staging website in the grid you wish to merge. In the grid, under action, select “Merge.” This will redirect you to a new page:

Select the content that you would like to merge into your current site. You can also schedule the merge if you wish, using Schedule Merge. This is useful to set the merge time at a period where your stores has the least amount of activity, as it is less likely to interrupt visitors. (You can also define the hour/minutes/seconds after choosing a date)
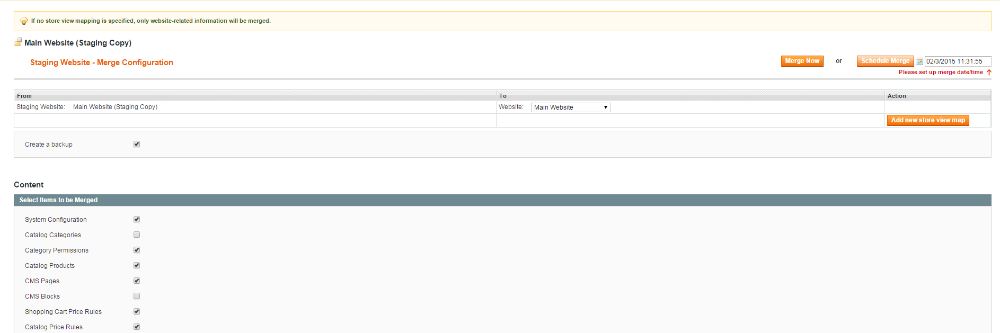
I recommend creating a backup when doing this, as this may unplanned or you may wish to rollback the merge that you created!
Rollbacks
To rollback Changes, Navigate to System -> Content Sharing -> Backups.
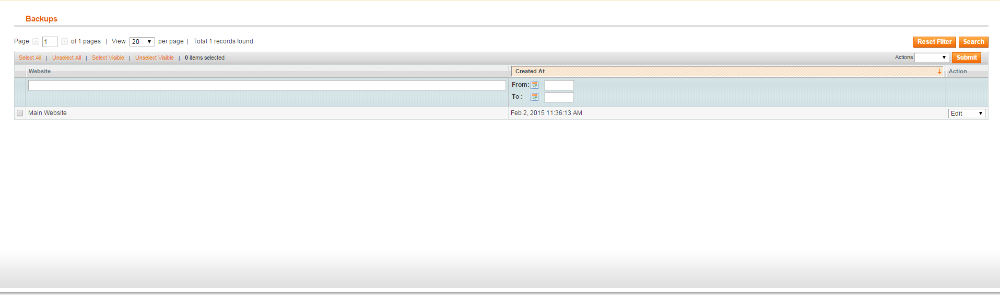
Click the backup you would like to revert to. Click the Rollback tab.
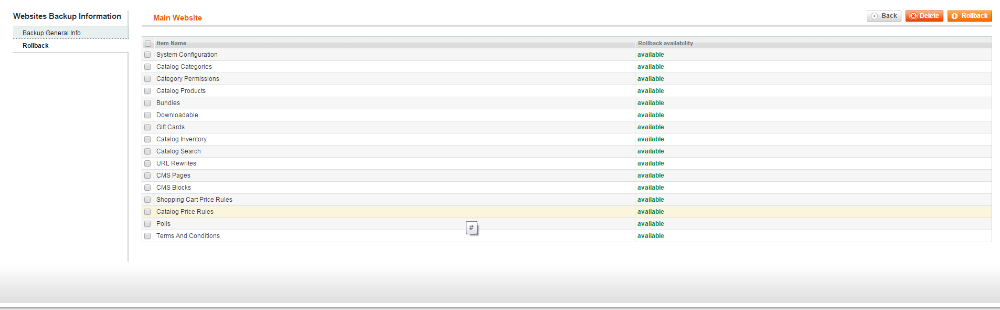
Here, select all the items you would like to rollback. Then Click “Rollback.”
Important Information:
You CANNOT and should NOT delete a product from a content staging website. It will delete it from the live site as well. Instead follow these instructions to disable it:
Catalog -> Manage products. Select the product.
In the “Websites tab,” uncheck the staging website.
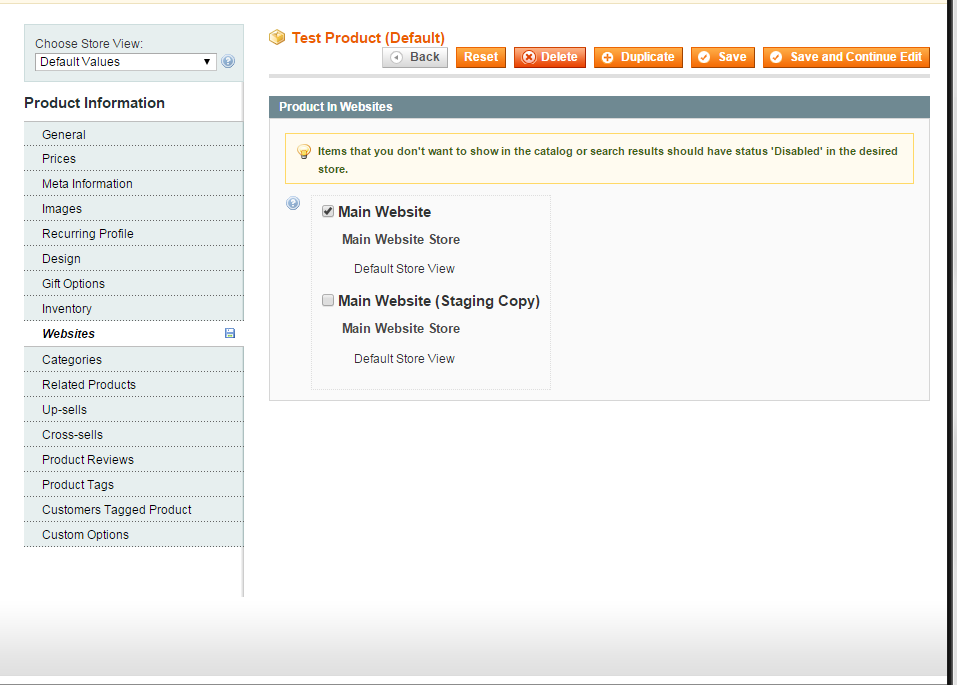
Save the product.
Merge the staging website into the product website by following the steps above.
In that screenshot you will also notice “Choose Store View” in the upper left. A second way of doing this is to change the store view, go to the “General” tab, and set the product to “Disabled.” You will still have to merge the staging website into the production website.
You can now safely delete the product as it is no longer used.
To create a product on a staging website:
Catalog -> Manage Products and “Add Product.” Create the product as usual but only set the Website to staging. Again, you will have to merge the staging website into the production website.
Magento Development Lead