Are you considering moving your eCommerce store to Shopify?
In the following guide, we’ll cover frequently asked questions about what it means to migrate to Shopify or Shopify Plus. Continue reading or skip ahead using the links below:
Table of contents

What Does a Shopify Website Migration Entail?
An eCommerce platform migration, or re-platforming, is when you move or transfer your eCommerce website from one platform to another. In this case, you will move everything—data, content, and integrations—from your existing eCommerce platform to Shopify.
Depending on the size of your eCommerce website and its complexity, this can be a months-long process. However, a solid plan can decrease time-to-launch and mitigate potential issues.
Shopify Migration Checklist
Here’s what you need to remember when migrating to Shopify. It might seem a little overwhelming, but this is where working with an agency can help ease your mind and efforts. If you don’t currently have an agency you’re working with we’d love to help.
System Integrations and APIs
- Inventory current integrations
- Determine needed integrations
- Document and address integration gaps with a development plan
SEO & Technical Migration
- Crawl site with Screaming Frog tool (free) or similar
- Identify top-performing pages
- Site Structure and Hierarchy: Define categories and subcategories
- URL Cleanup and Redirects: Audit URLs and determine and test 301 redirects and 404s
- Review metadata and implement schema markup
- Perform a content inventory: Remove old and duplicate content
- Check site speed
- Generate and submit XML Site Map to Google, Bing, and other search engines
- Install and configure analytics (Google Analytics) and marketing tools (Hubspot, Google Search Console, etc.)
- Run Benchmarks
- Conduct technical checks
- Check crawlability and indexability with Google Search Console’s Crawl Stats Report or the like
- Audit your store’s performance with the previous store’s benchmarks
- Run all marketing and technical reports and optimize accordingly
Shopify Product Migration Steps
Prepare Product data
Preparing your product data is the first step in migrating your products to Shopify. This involves gathering all the information about your products, such as the product name, description, price, images, and any other relevant information. You should also organize your product data in a spreadsheet or CSV file so that it’s easy to import into Shopify.
Set Up Your Shopify Store
The next step is to set up your Shopify store. You must sign up for a Shopify account if you don’t already have one. Once you’ve signed up, you can start setting up your store. This involves choosing a theme from the Shopify Theme Store, customizing your store’s design, and adding branding.
Import Your Products Into Shopify
Once you’ve prepared your product data and set up your Shopify store, the next step is to import your products into Shopify via the Shopify product import tool. This tool lets you import product data from a CSV file or another eCommerce platform. To import your products into Shopify, follow these steps:
- From your Shopify admin, go to Products > All products.
- Click on the Import button.
- Select the CSV file that contains your product data.
- Follow the prompts to map your product data to Shopify’s fields.
- Review and confirm the import.
Set Up your Shopify product variants
If your products have variants, such as different sizes or colors, you must set up these variants in Shopify. To do this, follow these steps:
- From your Shopify admin, go to Products > All products.
- Click on the product that you want to add variants to.
- Click on the Variants tab.
- Click on the Add Variant button.
- Enter the variant details, including the variant name, SKU, and price.
- Click on the Save button.
Set up your product categories
To help your customers find your products, you should set up product categories in Shopify. This allows you to group your products into logical categories, such as Clothing, Electronics, or Home Goods. To set up your product categories, follow these steps:
- From your Shopify admin, go to Products > Collections.
- Click on the Create Collection button.
- Enter the collection details, such as the collection name and description.
- Click on the Save button.
- Add your products to the collection by clicking on the Add Products button.
Set up your product images
Adding high-quality images to your products makes them look attractive and professional, thus increasing your conversion rate. To add images to your products in Shopify, follow these steps:
- From your Shopify admin, go to Products > All products.
- Click on the product that you want to add images to.
- Click on the Images tab.
- Click on the Add Images button.
- Upload your images and add any additional details, such as alt text or captions.
- Click on the Save button.
- Test your products
Once you’ve migrated your products to Shopify, testing them to ensure they work correctly is essential. This involves checking that the product details, prices, images, and variants are all correct and that customers can add products to their cart and check out successfully.
How to Migrate Customers to Shopify
1. Export Customer Data from Your Current Platform
The first step is to export your customer data from your current eCommerce platform. The export process varies depending on the platform you’re using. In most cases, you’ll need to access your platform’s admin panel, navigate to the customer or user section, and look for an export option. Your platform may provide a CSV or Excel file containing your customer data.
2. Format the Customer Data
To import customer data into Shopify, you must format the exported data to match Shopify’s requirements. The CSV or Excel file should contain the following columns:
- First Name
- Last Name
- Phone
- Company (optional)
- Address1
- Address2 (optional)
- City
- Province (or State)
- Zip (or Postal Code)
- Country
- Accepts Marketing (whether the customer has opted in for marketing emails)
- Ensure that the column headers match Shopify’s customer fields exactly, or the import may fail.
3. Import Customers Into Shopify
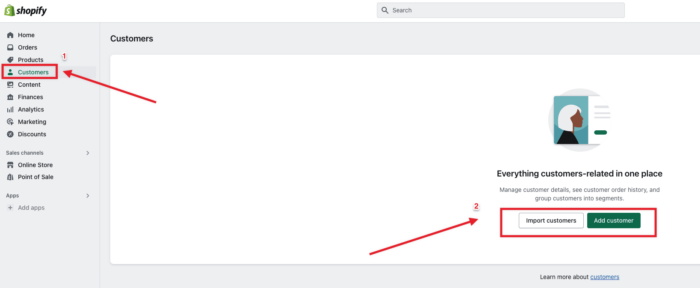
Once you’ve formatted the customer data, it’s time to import it into Shopify. From the Shopify dashboard, go to Customers > All customers. Click on the “Import” button and select your formatted CSV or Excel file.

Shopify will prompt you to review the file and map the columns from your file to the corresponding fields in Shopify. Ensure that the data is correctly mapped, and if needed, adjust the mappings to ensure accurate import.
After reviewing and confirming the mappings, click on “Import customers”. Shopify will begin importing your customer data. The time it takes to import depends on the size of your file and the number of customers you’re importing.
4. Review and Update Customer Information
Once the import is complete, you must review and update the customer information in Shopify. Go to Customers > All customers to see your imported customer data. You may need to adjust customer details, such as addresses, phone numbers, or marketing preferences, to match Shopify’s requirements.
5. Notify Customers about the Migration
Notifying your customers about your new website ensures a smooth transition. Consider sending an email or notification informing them about the move, any changes in the website URL, and any new features or benefits they can expect. It is also a good practice to not migrate customers’ passwords. Instead, prompt them to reset their password via a link sent to their email.
Pros and Cons of Shopify Plus
Advantages
Quick Launch
Anytime you upgrade your systems, it can take several months, even years, depending on the complexities—not so with Shopify Plus. In fact, according to Shopify, you can be up and running with Shopify Plus in 90 days or less. A quick launch lets you enjoy the benefits of re-platforming quickly.
Cost-Effective eCommerce Platform
According to Shopify, Shopify Plus members save 80% over their legacy implementation. Designed for high-volume merchants, there are no transaction fees for Shopify Plus merchants, making this a cost-effective solution. While the monthly fee sounds expensive, the reduced credit card processing fees can offset the price (compared to other Shopify plans with higher processing fees).
Plan: Starts at $2000/Month: This includes the eCommerce Platform (CMS), hosting, and basic theme. Customized themes are extra.
Shopify Store Management & Optimization Solutions
The Shopify Plus platform offers a lot: From Shopify Pay to app integrations and success management and wholesale (B2B) management, you get robust store management and optimization solutions with Shopify Plus. Shopify Plus has many growth tools to help grow your eCommerce business.
Disadvantages of Migrating to Shopify Plus
Monthly Fee
Shopify Plus’s monthly fee is high, but it’s for high-volume, high-revenue stores. The other Shopify tiers can be cheaper. So, the fee is nominal and worth it for a store earning $20-40K monthly in revenue. However, in the long run, the total cost of ownership—, what you get for the money (all-inclusive), makes it a cost-effective solution for more extensive, high-earning stores.
Shopify Payments
While Shopify Payments has many advantages for most merchants, there are some disadvantages. First, Shopify Payments are available in many countries—but not all. If you’re doing business in countries not available with Shopify Plus, you can use a third-party gateway, but Shopify charges for it. Additionally, when chargebacks occur, this can freeze associated funds while Shopify investigates.
Back-end Customization and Content Management Functionality
Shopify Plus is excellent as an eCommerce platform but lacks two key areas. First, you must use Shopify’s APIs to customize back-end solutions, which can limit customization to those with development-level technical skills. Second, content is not king on Shopify Plus. The Shopify CMS comes with a built-in blogging engine but WordPress users may feel shortchanged in this area.
Migrating Your Tech Stack to Shopify Plus
Step 1: Audit Your eCommerce Store’s Data
Before backing up your store, audit the data in your store’s database for accuracy and completeness. Delete anything that is not needed. Fill in any missing information as required.
Specifically, you’ll want to check the following:
(a) Verify Category and Subcategory Accuracy and Completeness
– Category Names
– Subcategory Names
– Subcategory Mapping to Categories
– Products Mapping to Subcategories
(b) Verify Product Inventory Accuracy and Completeness
– Product Name
– Description
– Images
(c) Verify Customer Data Accuracy and Completeness
– Customer Name
– Customer Details (contact and demographic information)
– Order History and Details
– Payment Information
– Passwords
Step 2: Back Up Your Commerce Store
Now that you have a clean version of your customer and store data, you can perform a backup.
There are three ways to migrate a store to Shopify:
1. Do-it-Yourself Manual Migration
A manual migration requires you to copy and paste your store data from your current platform into your new platform. This sounds simple; however, manual migrations can be filled with human error.
2. Do-it-Yourself Automated Migration
Using Shopify apps, like the free Multichannel Migrator app, you can securely and safely move your Adobe Commerce, WooCommerce, and BigCommerce store data—products, orders, customer data, etc.—securely and safely. While no technical skills are required to successfully migrate your site using this app, remember GIGO (garbage in, garbage out). As discussed in Step 1, ensure your data is clean before automating your data migration to Shopify.
Another automated Shopify migration service we’ve seen merchants use is Cart2Cart. You can see more about how their migration is in this video:
3. Done-for-You: Hire Help
If you don’t feel confident migrating your eCommerce store to Shopify Plus, you can always hire a team to do it for you. This way, you can ensure everything gets done right and on time.
Need help? Let our team handle your Shopify migration for you. Book a Free Consultation now.
Step 3: Migrate Your Tech Stack (Integrations, Apps, and Extensions) to Shopify Plus
You’ve cleaned and backed up your data. Now you’re ready to migrate your eCommerce tech stack to Shopify. Here’s how to ensure your Shopify migration is a success.
Payment Processing
Payment processors allow you to accept credit, debit, and digital payments, like PayPal, on your website. This is crucial to your eCommerce business. You need a safe, secure, and reliable payment processor. Customers must trust your company to do business with you, so choose payment processors that customers trust and are willing to use.
Stripe is one of the most well-known payment processors. Many of the largest payment processors use Stripe to process payments—including Shopify Payments. Why? Stripe has exceptional back-end security to ensure transactions are fraud protected. Stripe works well for different business models, everything from eCommerce stores to subscriptions, marketplaces, and more. Plus, Stripe is available in 135 currencies with over a dozen payment methods (Having so many payment options available through Stripe increases conversions—in any country.
Shopify Payments
Stripe backs Shopify Payments. With Shopify Payments, eliminate the need to setup up third-party providers. Shopify Payments is automatically installed, so your store can accept payments at launch. For orders processed through Shopify Plus, Shop Pay, Shop Pay Installments, and Pay Pal Express, there are no transaction fees (in most countries). Learn more here. Additionally, because Stripe integrates well with Shopify, the added benefits include an improved checkout experience and conversions.
Onsite Search
When customers can’t find the products they want to buy through navigation, they turn to onsite search. If your search functionality is not up to par, you’re leaving money on the table. Key features that help your customers find what they want—auto suggestions, filters, synonyms, and more—can help improve onsite search and conversions. Suppose you’re currently using Fast Simon on Magento. In that case, you can continue to use it on Shopify Plus or choose another app like Algolia, Klevu, Findify, and Searchspring, to name a few.
Algolia is Shopify Plus’ top search and discovery app. You can merchandise, analyze, and optimize the shopper’s experience. Ensure that customers find the products they are looking for with relevant search results. Algolia offers improved search analytics, personalization, and product merchandising. Integrating with Shopify Plus, Algolia allows you to create highly personalized customer experiences. Additionally, Algolia’s API is well-documented and easy to work with.
Subscriptions
Whether subscription revenue is a significant portion or you’re just starting, it’s a great way to secure and improve customer lifetime value CLV). You’ll need a reliable subscription integration to keep your subscription revenue consistent post-migration.
By connecting to your existing tech stack, Recharge allows you to offer subscription services to your customers in minutes. Customers can conveniently manage, pause, skip, restart, or delay their subscription services based on their life and financial circumstances. This allows you to keep valuable customers through life’s ups and downs. When ready, customers can resume their subscription in a few clicks.
Read our post on Recurring Revenue to learn how to grow your business with subscriptions.
Loyalty
Customer loyalty programs are a great way to retain good customers. After all, selling to existing customers is cheaper than acquiring new ones. Use your loyal customers’ behavior to influence loyalty in other customer segments. If you’re using LoyaltyLion or Yotpo on, you can quickly move customer and historical data to Shopify Plus.
Create a super personalized experience for your loyal customer base. Whether you create rewards for birthdays, social shares, referrals, or purchases, LoyaltyLion can help you develop tips your customers will appreciate. You can choose to reward your customers with discounts, free shipping, gift cards, and more. As a certified Shopify Plus partner, migrating your loyalty program to Shopify Plus is simple. Also, LoyaltyLion offers exclusive features to Shopify Plus users.
Reviews
eCommerce businesses can be made or broken by their reviews. Honest and genuine reviews from your customers can be your best salesperson. Many people base their buying decision on reviews, especially where you can see or touch the product in person. Shopify Plus offers a slew of review apps like Yotpo.
Reviews with pictures and videos are the best. With Yotpo, you can provide user-generated reviews with photos and videos. Yotpo also has a loyalty program that allows you to reward customers for their picture- and video-enabled reviews. Since Yotpo is available on Adobe Commerce (Magento) and Shopify Plus, you’ll get a seamless integration when you migrate.
Personalization
Personalization is a game changer for any eCommerce. Giving customers exactly what they want—without hunting for it—can dramatically change the customer experience. With personalization, you create user-specific experiences based on past behavior and purchases. Shopify Plus offers several personalization apps to help you develop these loyalty-worthy experiences.
With Nosto, use customer behavior, product attributes, and performance data to build and launch personalized experiences in minutes. Engage customers with dynamic shopping experiences based on individual and cohort behavior, like product recommendations. Enjoy higher conversions and generate more revenue. Nosto integrates well with Shopify Plus.
Email Marketing
Email marketing is one of the most effective and low-cost ways to engage with your target audience. However, you need a reliable and flexible email marketing solution to be competitive. Whether you’re an email marketing expert or just starting, make the most of your migration to Shopify Plus by choosing a stand-out email marketing solution like Klaviyo.
Klaviyo, the Shopify Plus-recommended email marketing solution, has best-in-class email marketing templates. No need to reinvent the already-working wheel. Instead, focus on creating content for your email marketing campaigns. Klaviyo also has an SMS messaging feature to reach your customer on the go. Last, the Klaviyo integration with Shopify is seamless. Need help? Contact our Marketing Team to assist with you with you email marketing plan and/or execution.
Customer Support
When customers need help, they want a quick and efficient process. To better help your customers, your customer support integration should provide easy access to their customer data, including purchase history, shipping details, and financial information. Choose a customer support integration that lets you easily connect and engage with customers.
Meet your customers where they are—whether on social media, via SMS, your website, or a mobile app, Gorgias has you covered. Do customers ask the same questions? Use Georgia’s automated responses to make your customer support interactions more efficient. With Gorgias helpdesk, you can consolidate support information so you don’t frustrate customers by asking for information you already have. You can connect Gorgias to your Shopify Plus store in under one minute.
Examples of Successful Shopify Plus Migrations
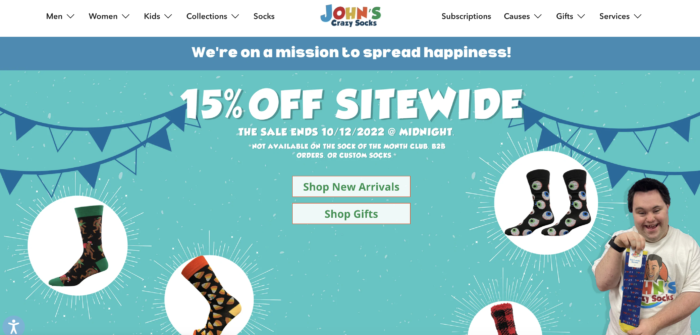
John’s Crazy Socks

John Cronin, a young entrepreneur with Down’s Syndrome, contemplated his post-high school career options. John didn’t like his options, so he went to his father, Mark Cronin, for help. That conversation became the idea for Crazy Socks, the family’s successful eCommerce business. The business is so successful that one traffic surge on its previous platform almost put them out of business. It was time for an upgrade, and they chose Shopify Plus.
Since upgrading to Shopify Plus, Crazy Socks has grown exponentially, generating $4 million in 22 short months. But that’s not all. Since Crazy Socks is a social enterprise, they’ve donated $170K to charities, including the Special Olympics. And, to top it off, Crazy Socks has a YoY rise in recurring revenue of 2,067%.
Tilley

Tilley, a Canadian heritage brand with roots in the outdoors, wanted to transition from a wholesale business model to a digital-first business. To accomplish this, Tilley needed a growth strategy and an agile eCommerce platform that could deliver—reliably.
They chose Shopify Plus. Leveraging apps like Klaviyo (email marketing), Gorgias (helpdesk), and Okendo (customer loyalty), Tilley hit the ground running—hard and fast. The results? A 200% YoY increase in conversions, a 142% increase in month-to-month transactions, and a 121% increase in month-to-month revenue.
Want to migrate to Shopify Plus? Shero is a Shopify Plus partner with over a decade of re-platforming and migration experience, and we’re here to help. Book a meeting with us today!
Gentian, CSO and co-founder of Shero Commerce, guides the company and client digital strategies. He's an expert in technical SEO, Inbound Marketing, and eCommerce strategy.


